L.A. at Night

L.A. at Night
"Jan Sells L.A."

Monday, September 12, 2011

Remodeling? Don't forget the Permit...

Home owners who fail to get a building permit for a remodeling project can jeopardize a sale. 

Example of work done with permits


When home owners take on a remodeling project, they’re often far more focused on choosing glistening fixtures for a new bathroom or debating the type of granite to use on a kitchen countertop than, say, navigating the intricacies of the building permit process. That could be a huge mistake, however, and it may not even come to light until the house is put up for sale. Ignoring local approval requirements not only poses safety and legal problems but also can potentially derail an otherwise smooth sale.

Home owners using licensed contractors for remodeling work typically don’t have to get involved with permitting. Most licensed contractors will handle the cumbersome process for them—filling out the paperwork with the municipality, collecting fees, and being present for the required inspections, says Michael Hydeck, president of the National Association of the Remodeling Industry. But when home owners tackle do-it-yourself projects or use unlicensed contractors, they risk problems later.


Ask Sellers Before You Buy


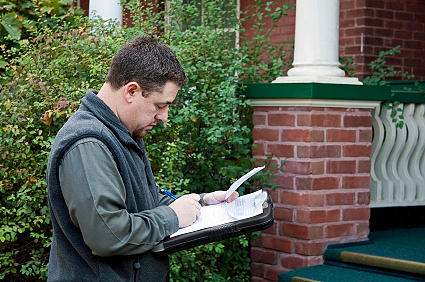
Home owners have to disclose any work that was done without a permit when in the process of selling a home. A home inspector evaluating a property for a buyer may also want to know whether a permit was obtained. Furthermore, the buyer’s appraiser may want to see permit records to check the legality of any home renovations.

“If no permits are found and it’s obvious the home has been renovated, the bank will likely refuse to make the loan,” according to the American Bar Association’s book Legal Guide to Home Renovation (Random House Reference, 2006). If the permitless work isn’t discovered until after closing, the home’s value could even be subject to a lawsuit, such as in cases when an addition added extra square footage to the home’s value but the construction wasn’t done legally with a permit. 

That’s why contractors and legal experts say buyers are well advised to ask sellers before they make an offer for a renovated home: “Did you get a permit for that?” 

Some home owners, however, are tempted to sidestep the permit process not wanting to pay the fees (municipalities generally charge a minimum issuing fee—such as $25—as well as an additional fee—sometimes 1 percent—of total construction costs), or they might not want to risk delaying a project or a sale by waiting for city inspections (obtaining permits can take anywhere from a day to six weeks or more).
The permit process varies widely from city to city and state to state). But the purpose of the document is the same everywhere: It offers ­assurance by a municipal building department that the work being done meets all safety codes.

Tuesday, August 2, 2011

FOUR WAYS TO EARN MONEY FROM HOME!

Learn how to make extra money from home by finding a flexible job that suits your personality and skills

If you are outgoing and persuasive...
Host product parties. More than 15 million people in the U.S. sell items for direct-sales companies, according to the Direct Selling Association.  This isn't just restricted to the handy reusable plasticware of yesteryear; there is likely a direct selling company for whatever your interest.
Here's a list of popular businesses that are offering sales jobs


If you are organized and efficient...
Be an administrative assistant.  Often business owners can save money by hiring independent contacts to perform tasks such as data entry, transcription and scheduling out of a home office.
Go to virtualassistantjobs.com to find out more.


If you are artistic...
There are plenty of sites to let your arty side shine and make some money in the process.
Etsy.com is a virtual marketplace where the craftier among us can sell their wares to shoppers from all over the world for a percent transaction fee.
Cafe Press allows you to design and sell your own graphic T-shirts, mugs and other printables from home for the cost of materials.


If you love writing...
Many websites need part-time writers.  Examiner.com pays people to write reviews for restaurants, shops, parks and concerts in their area.
If reviews aren't quite your thing, ProBlogger has listings of sites that are willing ao pay semi-professional writers.  Over time, good writers have found this sort of freelancing can be quite lucrative.  Every website has a different application process, so log on and get paid.

Hope these suggestions help - remember, I'm always just a phone call away!


Wednesday, July 20, 2011

5 Questions to Ask Your Home's Inspector


Most home buyers feel like they are bona fide real estate experts after all the studying up on loans and neighborhoods, online house hunting and open house visiting it takes just to get into contract on a home these days. But for all but the most handy of house hunters, getting into contract and starting the home inspection process only surfaces how little you actually know about the nuts and bolts and brick and mortar of the massive investment you’re about to make: a home!  

So, you hire a home inspector, but it seems like they’re speaking an entirely different language - riddled with terms like “serviceable condition” and “conducive to deterioration” - about your dream home!  Here are 5 questions you can use to decode your home inspector’s findings into knowledge you can use to make smart decisions as a homebuyer - and homeowner.

1.  How bad is it - really?  The best home inspectors are pretty even keeled, emotionally speaking.  They’re not alarmists that blow little things up into big ones, nor do they try to play down the importance of things.  They’re all about the facts.  But sometimes, that straightforwardness makes it hard for you, the home’s buyer, to understand what’s a big deal and what isn’t so much - the information you need to know whether to move forward with the deal, whether to renegotiate and what to plan ahead for.  

I’ve seen things categorized in home inspection reports under “Health and Safety Hazards” that cost less than $100 to fix, like replacing a faucet that has hot and cold reversed.  And I’ve seen one-liners in inspection reports, like “extensive earth-to-wood contact” result, after further inspection, in foundation repair bids pricier than the whole cost of the home!  

In many states, home inspectors are not legally able to provide you with a repair bid, but if you attend the inspection and simply ask them whether or not something they say needs fixing is a big deal, nine times out of ten they will verbally give you the information you need to understand the degree to which the issue is a serious problem (or not).

2.  Who should I have fix that?  I always ask this question of home inspectors, with dual motives.  First, very often, the inspector’s response is - “What do you mean?  You don’t need to pay someone to fix that.  Go down to Home Depot, pick up a ___fill in the blank__, and here’s how you pop it in.  Should cost you $15 - tops.”  And that’s useful information to know - it eliminates the horror of a laundry list of  repairs and maintenance items at the end of an inspection report to know that a number of them are really DIY-type maintenance items.  Even buyers who are really uncomfortable doing these things themselves then feel empowered to either (a) watch a few YouTube vids that show them how it’s done, or (b) hire a handyperson to do these small fixes, knowing they shouldn’t be too terribly costly.

And even on the larger repairs, your home inspector might be able to give you a few referrals to the plumbers, electricians or roofers you’ll need to get bids from during your contingency period, which you may be able to use to negotiate with your home’s seller, and to get the work done after you own the place.  Dropping the inspector’s name might get you an appointment booked with the urgency you need it in order to get your repair bids and estimates in hand before your contingency or objection period expires.

And same goes for any further inspections they recommend - if neither you nor your agent knows a specialist, as the general home inspector for a few referrals.

3.  If this was your house, what would you fix, and when?  Your home inspector’s job is to point out everything, within the scope of the inspection, that might need repair, replacement, maintenance or furthe inspection - or seems like it might be on it’s last leg.  But they also tend to be experienced enough with homes to know that no home is perfect.  Many times, I’ve asked this question about an item the inspector described as “at the end of its serviceable lifetime” and had them say, “I wouldn’t do a thing to it.  Just know that it could break in the next 5 months, or in the next 5 years.  And keep your home warranty in effect, because that should cover it when it does break.”

This question positions your home inspector to help you:
  • understand what does and doesn’t need to be repaired,
  • prioritize the work you plan to do to your home (and budget or negotiate with the seller accordingly),
  • get used to the constant maintenance that is part and parcel of homeownership, and
  • understand the importance of having a home warranty plan.


4.  Can you point that out to me? Often, when you attend the home inspection, you’ll be multi-tasking, taking pictures of the interior, measuring for drapes or furniture, even meeting the neighbors, or fielding several inspectors at a time.  Worst case scenario is to get home, open up the inspector’s report and have no clue whatsoever what he or she was referring to when they called out the wax ring that needs replacement or the temperature-pressure release valve that is improperly installed.  

Your best bet is to, at the end of the inspection, while you’re all still in the property, just ask the inspector to take 10 or 15 minutes and walk you through the place, pointing out all the items they’ve noted need repair, maintenance or further inspection.  When you get the report, then, you’ll know what and where the various items belong. (One more best practice is to choose an inspector who takes digital pictures and inserts them into their reports!)

5.  Can you show me how to work that? Many home inspectors are delighted to show you how to operate various mechanical or other systems in your home, and will walk you through the steps of operating everything from your thermostat, to your water heater, to your stove and dishwasher - and especially the emergency shutoffs for your gas, water and electrical utilities.  This one single item is such a time and stress saver it alone is worth the lost income of missing a day of work to attend your inspections. 

Remember, I'm here to answer all your questions!

Thursday, July 14, 2011

7 SURPRISING THINGS YOU CAN FREEZE!

Save money utilizing your freezer, and learn how to keep foods at their best.

Cheese

You can freeze many hard or semi-hard cheeses, such as Cheddar, mozzarella, muenster, provolone, Swiss and Parmesan. They may become crumbly after you thaw them, so plan to use them in cooking rather than to slice or place on sandwiches. Wrap cheese tightly in plastic wrap and place in a freezer bag for up to 4 months. Thaw in the refrigerator and use within a day or two of thawing


Milk

Unless you know you’ll use a whole container shortly after thawing, it’s best to freeze milk in smaller portions. One-cup or pint-size portions are convenient. Freeze milk in freezer-safe containers or in well-sealed freezer bags – but be sure to include some extra space, as milk expands when it freezes. Use the frozen milk within 1 month. Defrost in the refrigerator, and shake it well before using it. Milk sometimes becomes grainy after it’s been frozen and defrosted – if the texture is too unpleasant to use for drinking or on cereal, use the milk for cooking or baking.

Citrus

The best way to freeze citrus is to freeze the juice in ice-cube trays until solid, then transfer the cubes to a freezer bag. Freeze it in 1- to 2-Tbsp. portions―it should keep indefinitely. Thaw at room temperature or in the fridge (or use lemon cubes in iced tea). You can also freeze the zest: Zest the fruit onto a sheet of plastic wrap, wrap tightly and place in a freezer bag.

Eggs

Whisk together whites and yolks until just combined. Measure into an ice-cube tray, using 3 Tbsp. of the mixture per segment (3 Tbsp. is equivalent to 1 large egg). Freeze until solid, then transfer cubes to a freezer bag for up to 6 months. Thaw in the refrigerator.

Tomato paste

Spoon tomato paste into an ice cube tray, freeze until solid, then transfer cubes to a freezer bag and freeze for up to 3 months. Be sure to measure how much you’re putting in each compartment (1 Tbsp. is a convenient amount) and label it on the freezer bag.

Nuts

Place nuts in an airtight container, or wrap them tightly in plastic and place in a freezer bag and freeze for up to 6 months. Thaw at room temperature or in the refrigerator – or, if using them for baking, toss them into a recipe frozen (though you may need to add a few minutes to your baking time).

Fresh herbs

For whole sprigs, wash, pat dry with paper towels, wrap tightly in plastic wrap and place in a freezer bag. Freeze for up to 6 months. Alternatively, chop herbs and place in an ice cube tray. Pour a tablespoon or two of water on top of the herbs and freeze. Transfer cubes to freezer bags; freeze for up to 6 months. To use, simply toss a cube into a skillet when the recipe calls for herbs and let the water cook off.


Wednesday, July 6, 2011

Wanna Go on a "PicNik" ?

Wanna go on a "Picnik"?  ...a photo PicNik that is...this is a photo enhancing program that is free (or approximately $2 a month if you upgrade)

You can tweak your photos, enhance the colors, add various frames, include your signature and more - it's fun, and easy to do!

Take a look at I photo I took of one of my listings...


Now here is my enhanced verson...


This took only a few minutes!  There is a lot more you can do - if you only have one photo to change, you can just upload it,make the changes and save them; but I would suggest creating a free account.  It only takes a couple of minutes and it saves your photos into your own gallery, with the ability to return any time and make additional changes.

Now go out there and have a Picnik!  If you can't figure it out, feel free to give me a call and I'll walk you through it....

Wednesday, June 29, 2011

Let there be Light! Saving Energy (& Money) with Lighting & Ceiling Fans

     One of the easiest, most affordable ways to cut your electric bill is by switching to compact fluorescent light bulbs (CFLs) throughout your home.
     Even if you only replace the bulbs in your five most-used light fixtures with CFLs, you can save more than $65 each year in electricity costs.  That's right - $65!  Plus, you'll spend less time and money replacing bulbs since CFLs last up to 10 times longer than traditional bulbs.


      CFLs come in just about every shape and size imaginable The most recognizable model is the curly-cue, but other designs are available for chandeliers, floodlights and more.
     Some CFLs even work with dimmer switches.  And if you are concerned about the harsh light given off by the first generation CFLs of years past, you'll be pleasantly surprised by the soft, natural light of today's CFLs.  Look for the words "soft white" or "warm white" on bulb packaging.

Saving with Ceiling Fans

     WHile you are changing the bulbs in your light fixtures, it's also a good time to make sure your ceiling fan is set up to keep you cool during the upcoming warmer months.

    Every time the seasons change, you need to switch the direction of your ceiling fan blades.  This can be done by simply flipping a switch located on your fan (usually on the portion close to the ceiling). 
     A properly used ceiling fan will allow you to adjust your thermostat setting about four degrees with no reduction in comfort.
     Here's how you can tell whether your fan is in heating or cooling mode.  Turn your fan on and stand (or sit) directly underneath it.  For summer and spring months, you'll want to make sure your ceiling fan is pushing air downward to help you feel cooler.  In the winter, change the fan's direction to make sure the fan is pulling air upward.  This upward flow of air will push the warm air near the ceiling down.

Stay cool, and remember to call me with any of your real estate questions!

Friday, June 17, 2011

Opa! Lemons are not just for Cooking!


As someone who's been married to a Greek for 17 years, I've grown accustomed to using a great deal of lemons in cooking. I've been very firmly instructed that lemons are a must for any kind of meat, poultry, fish, and of course, the famous Avgolemono soup.  Friends often give me bags of lemons, and when I tell them I only need a few, they say, "Don't worry - you'll use these up in no time!" (they are usually right!)

I have discovered that in addition to cooking, this versatile little sour yellow fruit has a lot more potential:

Freshen Bad Breath: Gargle with lemon juice and water to kill odor-causing bacteria, or suck on the lemon wedge served with your water.

Soften Skin: Combine lemon zest with sugar and soak the mixture with olive oil (OPA!)for 30 minutes for a homemade body scrub.

Add Sunny Highlights: (Especially useful for men!) Want to lighten your tresses a notch or two? Mix lemon juice with your favorite conditioner and apply to damp locks before heading out to catch some rays.

Fix a streaky tan: To lighten a botched self-tanning job, rub a halved lemon over the area.

Whiten yellow nails:  Soak fingers in lemon juice for 5 minutes.  To prevent stains in the future, apply a clear protective base coat before nail polish.

Zap Zits: Try lemon juice on blackheads at night to clar up skin.


In addition, the acid in lemons has antiseptic properties and a fresh scent, making it a natural solution for household chores.  Save money by using this citrus fruit to replace costly cleaning products:

Kill microwave Smells: Fill a heat resistant bowl with water and half a lemon and zap for 5 minutes

Bust Dust Particles: Mix 10 drops lemon oil, 2 tablespoons lemon juice & a few drops olive oil (OPA!)in a spray bottle.  Spray onto surfaces, and wipe with a cotton flannel cloth.

Attack a stain: Add 1/2 cup lemon juice to a load of white laundry, then let dry in the sun.

Clean the bathroom:  Put lemon juice on a sponge and wipe shoewr doors to remove soap scum.

Sparkle & Shine: This natural bleach & disinfectant cleans brass & copper.  Sprinkle salt over half a lemon,rub it over the metal and wash clean!

So.....the next time someone offers you a bag of lemons - TAKE IT & enjoy!


Wednesday, June 8, 2011

15 Household Products You Don't Need to Buy

Save money by using items you already have on hand
that will do the same job - for less!


Substitute and save
There's no need to buy costly household products that will strain your budget and clutter your cupboards. For your home improvement and cleaning projects, use items you already own as easy alternatives, and save big in the process!

Wall filler  
Toothpaste
You can use white toothpaste to fill in errant holes in your walls. As long as the walls are painted white, the toothpaste will blend right in.

Scuff remover

Peeled banana
To get rid of scuff marks, rub the inside of a banana peel over silverware, leather shoes and leather furniture.
Wipe with a soft cloth. Be sure to test on a small, inconspicuous section first.

Wallpaper cleaner

White bread
Soft chunks of crustless white bread will get smudges off wallpaper and wipe away fingerprints and other grime.

Hardwater stain remover

To get rid of lime buildup, make a paste of 1 teaspoon vinegar and 2 tablespoons salt.
Apply to sink fixtures and rub with a cloth.

Drain cleaner

Sprinkle 1/4 cup baking soda in the drain, followed by 1 cup vinegar.
Let sit for 15 minutes, then flush with a pot of boilng water.

Stovetop protectant
Rub a thin veneer of car wax on your stovetop, then wipe it off. The wax allows future cooking spills
to lift off more easily.

Enamel repair paint


Use correction fluid (like White-Out) to cover nicks & chips on white enamel kitchen appliances
 like ranges & mixers.

Stainless steel polish


A staple in most garages, WD-40 also works wonders on stainless steel.
Just spray and rub with a cloth for a spotless shine.
.

Mirror Cleaner


Clean a bathroom mirror with shaving cream (the old-fashioned white kind, not a gel variety),
then wipe with a soft cloth. This tip also helps keep the mirror fog-free after showers.  
.

Silver jewelry polish


Using a soft toothbrush, scrub pieces of silver jewelry with a bit of toothpaste containing baking soda.
Rinse with warm water to restore sparkle.


Drawer lubricant


Unstick drawers and keep them sliding smoothly by rubbing the runners with a candle or bar of soap. 
  

Vase cleaner


To get glass vases sparkling clean, fill three-quarters with hot water, add a teaspoon of baking soda and shake. Let stand overnight; rinse.


Plant duster

Clean and shine the leaves of houseplants by wiping them down with the inside of a banana peel.

 Weed killer


Instead of using harsh chemicals, spray vinegar in the cracks of your walkway to get rid of weeds.

Grill degreaser


To maintain a clean barbecue grill, sprinkle dry baking soda on a damp brush, scrub, then rinse.

Hope these tips are useful!  Remember, I LOVE REFERRALS!

Wednesday, May 25, 2011

5 Ways to Add Luxury to Your Home Part II

 Check last week's blog if you missed Part 1!

4.  Dedicated spaces for anything.  There’s no need to go all Candy Spelling and dedicate multiple rooms to gift wrapping.  But space is a luxury in and of itself, so dedicated space for your film-watching (a theater room), gardening materials, crafting supplies or even the kids’ homework is an extra-special, super-duper luxury, especially if it’s equipped with the right equipment for the activity to which the room, half-room or even corner or nook is dedicated.

 5.  Automation.  Remember the Jetsons?  The vision for this century was a fully automated, robotic home that did all the work of life for you, so your time would be free to shop at Mooning Dales or work for Mr. Spacely building sprockets.  Most of that hasn’t happened, and that’s probably for the good.  But injecting small touches of automation into your home can give it a decidedly high-end feel - for very, very little cash.


 Put a couple of these  automated trash cans- $60 each! - into your kitchen. They’re hands free, so eliminate the germiness and clunkiness of opening a lid with your hands or feet, and they will be the hit of any dinner party!   Many hands-free or automatic household items are available at very low prices, like automatic soap pumps, paper towel dispensers and robotic vacuum cleaners. 


It's easy to add Luxury to your home!  Give it a try!

LOOK FOR NEXT WEEK'S BLOG -
"23 HOUSEHOLD PRODUCTS YOU DON'T NEED TO BUY! "
And remember to call me for any of your real estate needs...